Call Capability (Android-SDK)
# Call Capability (Android-SDK)
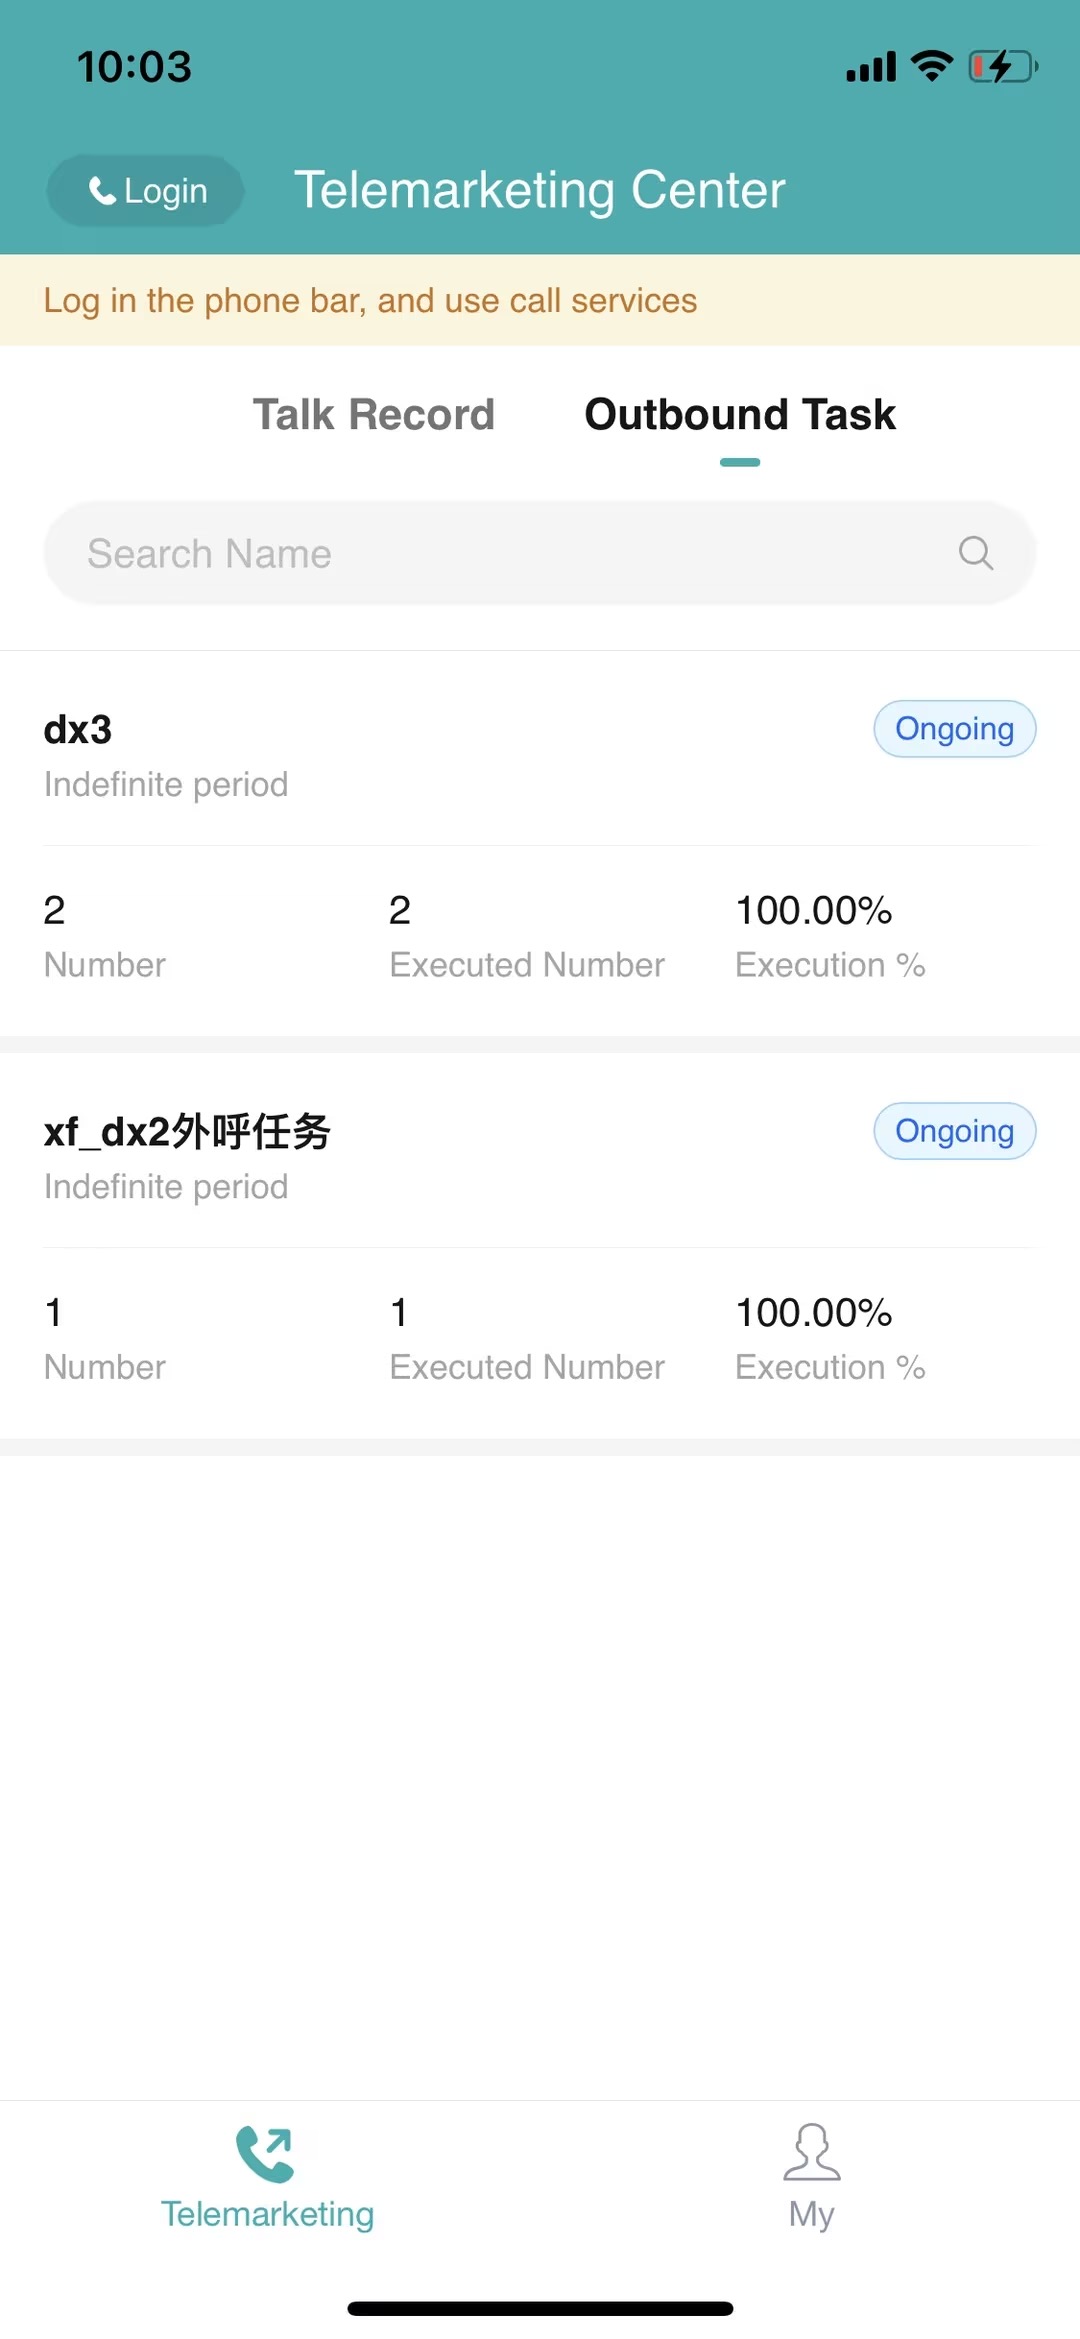
Sobot provides the enterprises with a full set of perfect intelligent agent solutions. The Sobot call SDK provides support for all call-related functions, and allows enterprises to complete call tasks, outbound calls, call monitoring, call recording, and other operations with the accounts they used.
Sobot call SDK has the following features:
- Provide a complete process of login - use - logout.
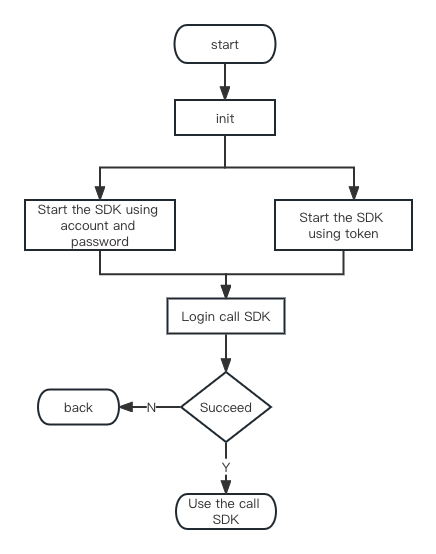
- Consist of two login modules: external login with synchronized token and regular login with username and password.
- Support call phone registration, call record query, call monitoring, agent status switching and other basic functions.

Related limits and notes:
Android SDK supports Android above 5.0 (API 21) and supports both portrait mode and landscape mode.
Android Studio should be upgraded to versions above 3.0.
Android SDK requires MIC permission; otherwise, some functions are not available.
SDK cannot be used in conjunction with the call function in the Sobot APP and the call function in the Sobot PC console.
# File Introduction
# ● Schematic Diagram of Integration Process

# ● File Description
SDK files include SDK source package (telemarketingsdk) , Demo source code (sobot_tm_sdk_demo) , Demo installation package (sobot_tm_sdk_demo.apk) and Doc related documentation.
| File | Description |
|---|---|
| SobotTMApi | The file provides an access function |
# Integration Method
# ● Dependency Integration
Starter:Latest version address (opens new window)
api 'com.sobot.call:telemarketingsdk:+'
In build.gradle:
dependencies {
    implementation 'com.sobot.call:telemarketingsdk:+'
    implementation 'com.squareup.okhttp3:okhttp:4.4.0'
    implementation 'androidx.appcompat:appcompat:1.0.0'
    implementation 'androidx.recyclerview:recyclerview:1.0.0'
    //Currently, several common image loading libraries are supported, and one must be selected from the image loading libraries below to add a dependency
    //implementation 'com.nostra13.universalimageloader:universal-image-loader:1.9.5'
    //implementation 'com.squareup.picasso:picasso:2.71828'
    //implementation 'com.facebook.fresco:fresco:2.6.0'
    implementation 'com.github.bumptech.glide:glide:4.9.0'
}
2
3
4
5
6
7
8
9
10
11
[Note]
If you want to use your own image loading method, you can use the following methods: SobotBitmapUtil. setImageLoader (new SobotImageLoader() {}); After using this method, the image loading method within the SDK will no longer be used when displaying network images.
# ● Manual Integration
Download link: Android_TMSDK_XXX (opens new window)
Import Module:
Unzip the downloaded Sobot Android_TMSDK_XXX.zip file, copy telemarketingsdk file to your project, then Build --> Clean Project, and add project dependencies in build.gradle.
After the above steps, content in build.gradle will be displayed as follows:
dependencies {
    implementation project(":telemarketingsdk")
    implementation 'com.squareup.okhttp3:okhttp:4.4.0'
    implementation 'androidx.appcompat:appcompat:1.0.0'
    implementation 'androidx.recyclerview:recyclerview:1.0.0'
    //Currently, several common image loading libraries are supported, and one must be selected from the image loading libraries below to add a dependency
    //implementation 'com.nostra13.universalimageloader:universal-image-loader:1.9.5'
    //implementation 'com.squareup.picasso:picasso:2.71828'
    //implementation 'com.facebook.fresco:fresco:2.6.0'
    implementation 'com.github.bumptech.glide:glide:4.9.0'
}
2
3
4
5
6
7
8
9
10
11
[Note]
If you want to use your own image loading method, you can use the following methods: SobotBitmapUtil. setImageLoader (new SobotImageLoader() {}); After using this method, the image loading method within the SDK will no longer be used when displaying network images.
About ProGuard:
Refer to the ProGuard configuration in the ProGuard file (Android_TMSDK_x.x.x\sobot_tm_sdk_demapp\proguard-rules.pro) to add ProGuard rules.
-dontwarn com.sobot.telemarketing.**
-keep class com.sobot.telemarketing.**{*;}
2
# Function Description
# ● Initialization and Domain Name
[Note: Before initiating Sobot call SDK, call the initialization method; otherwise, the SDK cannot be initiated.]
The initialization method is executed locally, with no asynchronous requests generated.
/**
* Initialize SDK
*
* @param application
*/
SobotTMApi.init(Application application);
2
3
4
5
6
The default is Tencent Cloud environment. If you are in another environment, please set the corresponding domain name.
/**
* Set domain name
*
* @param application
* @param config configuration class
*/
SobotTMApi.setHost(Application applicgtion,  SobotCallConfigEntity config);
2
3
4
5
6
7
SobotCallConfigEntity :
| attribute | name | types | nullable |
|---|---|---|---|
| openApiHost | Universal Interface Service Address | String | deny |
| callApiHost | Electronic sales interface service address | String | deny |
| stompSocketUri | Seat signaling service | String | deny |
| janusSocketUri | Janus Message Listening Service | String | deny |
# ● Initiate Sobot Page
Method 1: Start the telemarketing system directly, automatically complete the login and redirect to the page. The three startup methods are as follows:
/**
* Start the telemarketing system through email password and enter the homepage
*
* @param context
* @param loginUser Customer service account
* @param loginPwd  Login password
* @param block     The callback result can be empty
*/
SobotTMApi.startWithAcount(Context context, String loginUser, String loginPwd, SobotResultBlock block) ;


/**
* Start the telemarketing system by setting the company token and enter the homepage
*
* @param context
* @param loginUser    Customer service account
* @param companyToken Company token
* @param block        The callback result can be empty
*/
SobotTMApi.startWithToken(Context context, String loginUser, String companyToken, SobotResultBlock block) ;


/**
* Start the telemarketing system by setting the appkey and appid to enter the homepage
*
* @param context
* @param loginUser Customer service account
* @param appKey    Log in to appKey and ask for after-sales colleagues to obtain it (this will be available when the customer account is opened)
* @param appId     Log in to the appId and ask the after-sales colleague to obtain it (this will appear when the customer account is opened)
* @param block     The callback result can be empty
*/
SobotTMApi.startWithAppkey(Context context, String loginUser, String appKey, String appId, SobotResultBlock block) ;
2
3
4
5
6
7
8
9
10
11
12
13
14
15
16
17
18
19
20
21
22
23
24
25
26
27
28
29
30
31
32
Method 2: In case of any special requirement, the SDK also provides a function of integrating chat interface in the way of Fragment embedding, so that developers can use the SDK more flexibly. You need to log in first and then perform jump operation.
The sample code is as follows (you can also refer to the Fragment implementation in SobotTMActivity).
SobotTMFragment sobotTMFragment = (SobotTMFragment) getSupportFragmentManager()
                .findFragmentById(getResId("sobot_call_contentFrame"));
        if (sobotTMFragment == null) {
            sobotTMFragment = SobotTMFragment.newInstance(SobotTMConstant.STARTUP_MODE_ACTIVITY);
            addFragmentToActivity(getSupportFragmentManager(),
                    sobotTMFragment, getResId("sobot_call_contentFrame"));
        }

public void addFragmentToActivity(FragmentManager fragmentManager, Fragment fragment, int frameId) {
    FragmentTransaction transaction = fragmentManager.beginTransaction();
    transaction.replace(frameId, fragment);
    transaction.commit();
}
2
3
4
5
6
7
8
9
10
11
12
13
# ● Login
/**
* Log in to the telemarketing system through email password
*
* @param context
* @param loginUser Customer service account
* @param loginPwd  Login password
* @param block     The callback result can be empty
*/
SobotTMApi.loginUser(Context context, String loginUser, String loginPwd, SobotResultBlock block);


/**
* Login to the telemarketing system by setting a token
*
* @param context
* @param loginUser      Customer service account
* @param companyToken   Company token
* @param isGoToActivity Do you want to redirect to the telemarketing center page? If true, redirect; if false, do not redirect
* @param block          The callback result can be empty
*/
SobotTMApi.loginWithCompanyToken(Context context, String companyToken, boolean isGoToActivity, SobotResultBlock block);


/**
* Log in to the telemarketing system by setting the appkey and appid
*
* @param context
* @param loginUser      Customer service account
* @param appKey         Log in to appKey and ask for after-sales colleagues to obtain it (this will be available when the customer account is opened)
* @param appId          Log in to the appId and ask the after-sales colleague to obtain it (this will appear when the customer account is opened)
* @param isGoToActivity Do you want to redirect to the telemarketing center page? If true, redirect; if false, do not redirect
* @param block          The callback result can be empty
*/
SobotTMApi.loginWithAppkey(Context context, String loginUser, String appKey, String appId, boolean isGoToActivity, SobotResultBlock block);
2
3
4
5
6
7
8
9
10
11
12
13
14
15
16
17
18
19
20
21
22
23
24
25
26
27
28
29
30
31
32
33
34
# ● Logout
/**
* Exit the system
* @param context
* @param loginUser Login account
* @param block Callback result, which can be null
*/
SobotTMApi.out(Context context, String loginUser, SobotResultBlock block);
2
3
4
5
6
7
# ● Set Debug Mode
/**
* Whether to display Sobot log, log filter tag: sobot_log
*
* @param isShow true Display; false Not display; not display by default
*/
SobotTMApi.setShowLogDebug(boolean isShow);
2
3
4
5
6
# Resource Deployment
# ● UI Resource Replacement
You can add the namesake color to colors.xml in the customer app to cover the color style in the Sobot SDK; replace the images in the Sobot SDK interface by placing a namesake image resource at the same location in the main project; replace the text in the Sobot SDK interface by placing a namesake text resource at the same location in the main project.
The following are common color configurations. More color and image resources can be found in the Download Source Package in the manual integration module.
    <!-- Theme color  Green by default -->
    <color name="sobot_call_theme_color">#09AEB0</color>

    <!--Page General background color -->
    <color name="sobot_call_bg_color">#EFF3FA</color>
    <!--Page  Level-2 background color -->
    <color name="sobot_call_second_bg_color">#FFFFFF</color>
    <!--Page Level-3 background color -->
    <color name="sobot_call_third_bg_color">#EFF3FA</color>

    <!-- Level-1 text Color -->
    <color name="sobot_call_wenzi_gray1">#3D4966</color>
    <!-- Level-2 text Color -->
    <color name="sobot_call_wenzi_gray2">#8B98AD</color>
    <!-- Level-3 text Color -->
    <color name="sobot_call_wenzi_gray3">#BDC3D1</color>
    <!-- Level-4 text Color Prompt text: Time, enter the prompt -->
    <color name="sobot_call_wenzi_gray4">#CCCCCC</color>

    <!--  Line  -->
    <color name="sobot_call_line_color">#E6E6E6</color>

    <!-- Header background -->
    <color name="sobot_color_title_bar_bg">@color/sobot_call_theme_color</color>
    <!-- Status bar color setting -->
    <color name="sobot_status_bar_color">@color/sobot_color_title_bar_bg</color>
    <!-- Header middle nickname color -->
    <color name="sobot_color_title_bar_title">@color/sobot_call_white_color</color>
    <!-- Header both-side menu font color -->
    <color name="sobot_color_title_bar_menu_text">@color/sobot_call_white_color</color>

    <!-- Control layout Pressed background color-->
    <color name="sobot_call_item_pressed">@color/sobot_call_line_color</color>

    <!-- Pop-up page Header background color-->
    <color name="sobot_call_pop_header_bg_color">#EFF3FA</color>
    <!-- Pop-up page Header text color -->
    <color name="sobot_call_pop_header_weizi_color">@color/sobot_call_wenzi_gray1</color>

    <!--Talk Interface Background color-->
    <color name="sobot_call_activity_bg">#FFFFFF</color>

    <!--Dial interface Phone no. Area Background color-->
    <color name="sobot_phone_numbe_bg">@color/sobot_call_bg_color</color>
    <!--Dial interface Phone no. Area Text Black-->
    <color name="sobot_phone_numbe_wenzi_gray">@color/sobot_common_gray1</color>
    <!--Dial interface Keypad Background color-->
    <color name="sobot_phone_keyword_bg">#FFFFFF</color>
    <!--Dial interface Keypad Text color 1 Black-->
    <color name="sobot_phone_keyword_wenzi_gray1">@color/sobot_common_gray1</color>
    <!--Dial interface Keypad Text color 2 Black-->
    <color name="sobot_phone_keyword_wenzi_gray2">@color/sobot_common_gray2</color>

    <!--Telemarketing Center task   Yellow Not start-->
    <color name="sobot_call_yellow_color">#EEB049</color>
    <!--Telemarketing Center task   Green Executing-->
    <color name="sobot_call_green_color">#21CFA6</color>
    <!--Telemarketing Center task   Grey Expired-->
    <color name="sobot_call_grey_color">#CFCFCF</color>
2
3
4
5
6
7
8
9
10
11
12
13
14
15
16
17
18
19
20
21
22
23
24
25
26
27
28
29
30
31
32
33
34
35
36
37
38
39
40
41
42
43
44
45
46
47
48
49
50
51
52
53
54
55
56
57
58
59
60
# Sobot Call SDK Function Experience Demo
Download the Demo source code (opens new window);
Download the installation package (opens new window);
# FAQ
1.Get token ?
Please get the login token through the Sobot login API. You should note that the token here is that obtained from development module, not the accessToken of the latest v6 version. In case of failure, you can log in with your username and password. The two methods have exactly the same effect.
- Why can't I log in normally?
Before login, please confirm whether to perform the initialization operation, which is a local assignment; there will be no asynchronous requests, and the domain name and basic configuration information will be set.
# Update Description
<SDK Version Update Description> (opens new window)
# Description of Sobot SDK's Collection and Use of Personal Information
Description of Sobot SDK's Collection and Use of Personal Information (opens new window)
